Managing and Interacting with content in your library is key, the Library offers users the ability to perform an array of tasks in bulk and on an individual asset basis, including;
| Action type |
| Download |
| Edit |
| Share |
| Add to work request |
| Manage usage rights |
| Check usage rights |
| Copy to - Collection, Projects or Presentation |
| Send to delivery |
| Remove |
| Remove from collection |
| Change media type |
| Create relationship |
| New collection |
Downloading Assets
Download your assets from the Library in two distinct ways:
- From the main assets view, either in the Assets or Collections tab, where can you see multiple assets at once.
- From the single asset view.
The Main Assets View
The first way to download is from the main assets view, i.e. any page where you see multiple assets at once - Assets tab, Collections tab, in either grid or list view.
Select the asset(s) by clicking the checkbox in the top-right corner of the asset and then click the download button above the assets ![]() , which will only appear once at least one asset has been selected.
, which will only appear once at least one asset has been selected.

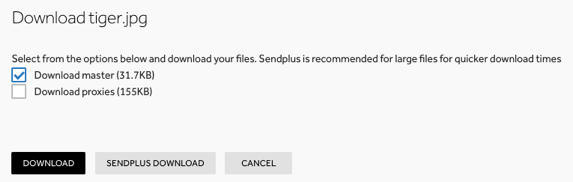
Single Asset View
Single asset view{{Single Asset View}} allows you to view all of the key information about an asset and gain an uncluttered preview of the asset itself. Below the preview you can click the download icon ![]() to see options for downloading the asset in your preferred version.
to see options for downloading the asset in your preferred version.
Uploading Assets
Upload assets directly into the Library by following these steps:
- Click the Upload button in the main asset view (not possible from within a Collection).
- In the following window either drag and drop the assets from your file system onto the window, or click Add Files and use your computer’s file picker to select your file. For uploads larger than 1GB we recommend using Sendplus.
- If you’ve made a mistake you can use the X to remove an asset from the list.

- Click Start Upload and your progress will be tracked in the bar below.
- You can cancel in-progress uploads by clicking the X button.
Use the agency dropdown to choose which Business Unit to upload to. This will be greyed out for users of one Business Unit.
Please be aware that the assets will be uploaded with technical metadata only. In order to utilise your library, we always recommend adding as much metadata as possible to the assets.
Relating Assets
To create relationships between assets, select them, click More Actions and then choose the Create Relationship option.

From the next screen, you must first define the relationship to be either Parent/Child or Master/Version and then pick which asset will become the parent or master.

Once the relationship is created, you'll be able to view its status by opening an asset in Single Asset View and clicking the relationships icon ![]() .
.

Adding to a Work Request
If your Business Unit uses Work Requests, you can add an asset to one in two ways:
From the main asset view, select an asset, click More Actions and choose Add to work request.

From the single asset view, use the more actions menu below the preview (⋮) and choose Add to work request.

Downloading Assets{nav}Uploading Assets{nav}Relating Assets{nav}